Jekyll converts markdown files to html; helps to generate blogs in a minimalistic style. This blog provides a quick start for installation, configuration, and simple usage.
Installation
Before you can use Jekyll to create a GitHub Pages site, you must install Jekyll and Git.
Note that must install ruby 3.x or lower. Higher versions such as 4.x have compatability issues with GitHub Pages.
Also the ruby version and gem versions must be compatible.
I personally started with ruby 2.7.2 (Summer 2024), then upgrade to ruby 3.1.6 later (Jan 2026). ✅
V3.x is much faster than V2.x, saving about half the local build time used by V2.x. GitHub Actions are much faster too. Previously, GitHub Actions took about 2.5 to 4.5 minutes to build the site with ruby 2.7.2. Now with ruby 3.1.6, it only takes about 1.5 minute. 👍
🎯 Note that:
Each ruby version maintains its own separate gem directory.
So when you upgrade ruby version, you need to re-install all gems for the new ruby version!
Run bundle install in the project folder after switching ruby version.
Q: Which ruby version am I using?
A: cd to your project folder and run ruby --version in the terminal.
Ruby version is specified in .ruby-version file in the root of your project. chruby will automatically switch to the ruby version specified in the file when you cd into the project folder.
Here is my installation steps using ruby-install and chruby on macOS$^{[1]}$:
$^{[1]}$ It takes some time (10 to 15 mins) to install ruby. Extra slow on an older Mac with slow internet connection. Be patient with the installation process.
# Install ruby 3.1.6 using ruby-installHOMEBREW_NO_AUTO_UPDATE=1 HOMEBREW_NO_INSTALL_CLEANUP=1 ruby-install ruby 3.1.6
# Set ruby version using chruby and check ruby version
chruby 3.1.6 && ruby --version# Source the system rc file (shell configuration file)source ~/.zshrc
# Verify available ruby versions, the current version is marked with asterisk
chruby
# Install all gems in Gemfile.lock using Bundler
chruby 3.1.6 && ruby --version&& bundle install# Start jekyll server to serve the website locally
bundle exec jekyll serve
Note that && is used to chain commands together. The next command will only run if the previous command is successful.
If your site failed to build, use bundle exec jekyll build --trace to get more detailed error messages for troubleshooting.
--port PORT: Set the local server port to listen on. Default: 4000.
Q: After installing some software which overwrites ~/.zshrc, I cannot build my Jekyll site anymore. I get the following error when I run bundle exec jekyll serve: Could not find 'bundler' (2.3.27) required by your Gemfile.lock.
bundle exec jekyll serve

/System/Library/Frameworks/Ruby.framework/Versions/2.6/usr/lib/ruby/2.6.0/rubygems.rb:283:in `find_spec_for_exe':

Could not find 'bundler' (2.3.27) required by your /Users/menghan/Documents/PhD Courses/Econ-Study/Gemfile.lock. (Gem::GemNotFoundException)

To update to the latest version installed on your system, run bundle update --bundler.

To install the missing version, run gem install bundler:2.3.27 from /System/Library/Frameworks/Ruby.framework/Versions/2.6/usr/lib/ruby/2.6.0/rubygems.rb:302:in activate_bin_path' from /usr/bin/bundle:23:in <main>'
The issue is that chruby needs to be configured to auto-switch Ruby versions in your shell.
❗Make sure your ~/.zshrc file has the chruby auto-switching enabled. It should contain these lines:
On Apple Silicon Mac, use
# Configure chruby to automatically switch to the Ruby version specified in `.ruby-version`source /opt/homebrew/share/chruby/chruby.sh
source /opt/homebrew/share/chruby/auto.sh
If you are on Intel Mac, use
# Configure chruby to automatically switch to the Ruby version specified in `.ruby-version`source /usr/local/share/chruby/chruby.sh
source /usr/local/share/chruby/auto.sh
The auto.sh script is what makes chruby automatically switch to the Ruby version specified in .ruby-version when you cd into the directory. Without it, you’d need to manually run chruby 3.1.6 each time.
After adding these lines to your ~/.zshrc, either restart your terminal or run source ~/.zshrc for the changes to take effect. This should prevent the issue from happening again when you restart VS Code.
Option 2: Install gems locally in your project instead of stystem-wide by running
This will install gems into a vendor/bundle/ directory within your project, making the setup more portable and avoiding permission issues.
Which shell am I using?
Starting with macOS Catalina (10.15), Apple set the default shell to the Z shell (zsh). In previous macOS versions, the default was Bash.
In zsh, the configuration file is ~/.zshrc.
In bash, it’s ~/.bash_profile.
Every time you make changes with the configuration file
run source ~/.bash_profile if you have bash. [Old Mac, Intel chip]
run source ~/.zshrc if the shell is zsh. [New Mac, M chip]
Managing Jekyll plugins with Bundler and Gemfile
A Gemfile is a list of gems used by your site. Every Jekyll site has a Gemfile in the main folder.
Create a Gemfile in the root. The file should be called ‘Gemfile’ and should not have any extension. You can create a Gemfile with Bundler and then add the jekyll gem:
bundle init
bundle add jekyll
Manage plugins
Append plugins to your Gemfile
source'https://rubygems.org'
gem 'jekyll'
group :jekyll_plugins do
gem 'jekyll-sitemap'
gem 'jekyll-feed'
gem 'jekyll-seo-tag'
end
gem"devise","~> 3.1"# same as >= 3.1.0 and < 4.0.0
Q: What is a Gemfile.lock?
A: Gemfile.lock file contains all the information about the gems that are currently installed. This file is created automatically after we run the bundle install command. A Gemfile.lock has a list of the exact versions of the gems required for the application.
Bundler is a gem that installs all gems in your Gemfile. Gem manager. Commands start with bundle <>.
Install Bundler using gem install bundler. You only need to install it once, not every time you create a new Jekyll project.
To install gems in your Gemfile using Bundler and serve the website, run the following in the directory that has the Gemfile:
bundle install# install gem dependencies for the project
bundle exec jekyll serve # serve the website, run the site locally
Now you can navigate to http://localhost:4000 to preview your site.
Jekyll rebuilds automatically after each change.
All of the normal Jekyll commands are available to you, but you should prefix them with bundle exec so that Bundler runs the version of Jekyll that is installed in your project folder.
bundle add webrick Add gem to the Gemfile and run bundle install.
help page bundle add --help
Jekyll file structure
Workflow of software development:
coding $\rightarrow$ build $\rightarrow$ deploy $\rightarrow$ test $\rightarrow$ release
Deploying
Deploying is taking website content and publishing it to the Internet. Technically speaking, it is the process of compiling, or building, your code and hosting the JavaScript, CSS, and HTML on a web server. After deployment, you will always have your live website, which is called the live environment or production environment.
Development
If you want the ability to make changes without these affecting your live website, then you can add additional environments. These environments are called development environments or deployment environments.
Layout inheritance is useful when you want to add something to an existing layout for a portion of documents on your site. The following templates are all based on base.html. You specify your original layout in front matter:
I put my custom css in /assets/css/style.scss for general setting and /assets/css/syntax.css for rouge syntax highlighting.
_sass
These are sass partials that can be imported into your main.scss which will then be processed into a single stylesheetmain.css that defines the styles to be used by your site.
Jekyll provides built-in support for Sass and can work with CoffeeScript via a Ruby gem. In order to use them, you must first create a file with the proper extension name (one of .sass, .scss, or .coffee) and start the file with two lines of triple dashes, not need to write front matter, like this:
------//startcontent.my-definitionfont-size:1.2em
Jekyll treats these files the same as a regular page, in that the output file will be placed in the same directory that it came from. For instance, if you have a file named css/styles.scss in your site’s source folder, Jekyll will process it and put it in your site’s destination folder under css/styles.css.
Pages are the most basic building block for content.
The simplest way of adding a page is to add an HTML file in the root directory with a suitable filename. You can also write a page in Markdown using a .md extension and front matter which converts to HTML on build. For a site with a homepage, an about page, and a contact page, here’s what the root directory and associated URLs might look like:
The hallmark difference between categories and tags is that categories of a post may be incorporated into the generated URL for the post, while tags cannot be.
add category variable in the front matter of each post.
Using the category frontmatter variable, we can make a categories page called categories.md in the _pages directory where you can categorize and list each post by its category like so.
You can specify the order of tags in the tag_order variable in _config.yml. Unlisted tags will show in the end of the list in the alphabetical order.
You need to restart the Jekyll server after changing the _config.yml file for the changes to take effect. An incremental rebuild won’t work.
pros: simpler to get a site set up; don’t need to manage branches;
cons: restricted whitelisted plugins and themes can be used.
GitHub now provides you with the option to use their in-house CI/CD product named GitHub Actions to build and deploy (host) your Jekyll site with complete control over the build environment and gemset.
Advantages of using GitHub Actions:
can specify any Jekyll version instead of using the classic GitHub Pages-provided version at 3.9.3;
.github/workflows/jekyll.yml:
steps:
-name: SetupRubyuses: ruby/setup-ruby@ec02537da5712d66d4d50a0f33b7eb52773b5ed1with:
ruby-version: '3.1'# Not needed with a .ruby-version file-run: bundleinstall# Install dependencies with Bundler-run: bundleexecrake
The setup-ruby action takes a Ruby version as an input and configures that version on the runner.
Alternatively, you can check a .ruby-version file into the root of your repository and setup-ruby will use the version defined in that file.
The setup-ruby action will automatically install bundler for you.
The version is determined by your gemfile.lock file.
If no version is present in your lockfile, then the latest compatible version will be installed.
can use any Jekyll plugins irrespective of them being whitelisted by GitHub, including any *.rb files placed in the _plugins directory of your site;
while using a custom theme is possible without Actions, it is now possible to use themes depending on features introduced in newer versions of Jekyll.
Build locally and push the build directory contents to the gh-pages branch on your repository.
Publishing from a branch.
pros: flexible, full control of your website contents
cons: have to mange branches; one master branch containing build html files and one source branch to manage all source files.
If we want to use a custom plugin or a newer version of Jekyll, for example, the Jekyll scholar plugin page to manage .bib files used in this research page,
group:jekyll_pluginsdogem'jekyll-scholar'
We need to build the _site locally in a branch other than master or gh-pages, and then sync and merge ONLY the built html files to either of these two branches.
We need to have a master branch, and a source branch (any name would do draft, working, etc).
master is where GitHub pages are deployed; It only include the _site directory.
source is where we work on writing the posts, css, js, etc. source has the entire jekyll project.
Note: It is recommended to change your default branch to source. Optionally, you can make the source branch protected to prevent it from being accidently deleted or overriden.
Make changes and build locally in source branch. This will create _site folder. _site folder (where the site is built into) should be in the .gitignore.
Navigate to master branch,
copy files in _site folder to the root folder.
create .nojekyll in the master branch. .nojekyll tells the gh-pages that there is no need to build.
Meanwhile, in the _config.yml of the source branch, under the include key, we need to add - .nojekyll.
By experience, my build times when using the first option are usually faster.
Until now, rouge should have been working on your site, but you won’t see the syntax highlighting as there is no css styling. The highlighting effect will appear once you add a css file following Step 3.
Create a css file for the highlighting style you want.
Rouge comes built-in with rougify, a command-line tool that converts a style theme to a css file.
You can check what languages are supported by entering:
rougify list
You can see the available rouge themes by entering:
For example, if you want to use the github theme, you first create a css file in your css folder using rougify:
rougify style github > assets/css/syntax.css
The usual directory for the css files is assets/css while the usual name for the syntax highlighting css file is syntax.css.
Then don’t forget to include the stylesheet in your HTML template (usually within <head></head>). You can add the following line to your _layouts/base.html layout file:
Note that {{site.baseurl}} is added before assets/css/syntax.css as we need to specify the relative path to the stylesheet. Otherwise, the file cannot be found by Jekyll.
Using highlight.js
Add highlight.js and css of the color scheme you want in the header page. Either you can add cdn url or copy it in your project and give local path. This will find and all highlight the code inside of <pre><code> tags.
Issue: Faild in Ubuntu-24.04-x64 runner when trying to deploy to GitHub Pages.
Error: The current runner (ubuntu-24.04-x64) was detected as self-hosted because the platform does not match a GitHub-hosted runner image (or that image is deprecated and no longer supported).

In such a case, you should install Ruby in the $RUNNER_TOOL_CACHE yourself, for example using https://github.com/rbenv/ruby-build

You can take inspiration from this workflow for more details: https://github.com/ruby/ruby-builder/blob/master/.github/workflows/build.yml

$ ruby-build 3.1.4 /opt/hostedtoolcache/Ruby/3.1.4/x64

Once that completes successfully, mark it as complete with:

$ touch /opt/hostedtoolcache/Ruby/3.1.4/x64.complete

It is your responsibility to ensure installing Ruby like that is not done in parallel.
Fix: Your workflow is using an older version. Need to update workflow.
I compared my .github/workflows/jekyll.yml with this script, making sure my actions versions are consistent.
I also commented out line 40 (# ruby-version: '3.1' # Not needed with a .ruby-version file).
Bundler default gem URI dependency error
bundler: failed to load command: jekyll (/home/runner/work/Econ-Study/Econ-Study/vendor/bundle/ruby/2.7.0/bin/jekyll)

/opt/hostedtoolcache/Ruby/2.7.2/x64/lib/ruby/gems/2.7.0/gems/bundler-2.4.22/lib/bundler/runtime.rb:304:in `check_for_activated_spec!':

You have already activated uri 0.10.0, but your Gemfile requires uri 0.12.0. Since uri is a default gem, you can either remove your dependency on it or try updating to a newer version of bundler that supports uri as a default gem. (Gem::LoadError)
Cause: The issue lies with Rubygems being outdated. If you update RubyGems, it will fix the issue.
Fix: Add the following line to jekyll.yml (in my case, I added to line 47 after Setup Pages). It installs the required version of the uri gem.
If you want the script available on every page, put the call in your base.html or post.htmllayout file, whichever your post template is. Every page that uses that default.html layout will then call the script. That layout file can be found at _layouts/base.html.
If you just want it on your current page, just call it in your some-page.md markdown in the same way.
If you only want to call it when it is live and DON’T want to call it while you are developing - like, for example, a google analytics script - then wrap the call in an if statement like this:
Q: How to add colon : in post title?
A: Enclose your title in quotation marks, e.g., "Academic Writing: Style Guidelines".
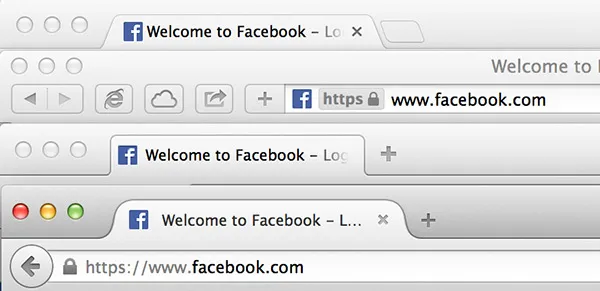
Q: What is a favicon?
A: It is the little tiny icon on the left side of most of your your browser tabs.
Q: How to add a favicon to your website?
A: Using the minima theme as an example, following the steps below:
Put your icon file in the Jekyll site folder, e.g., images/favicon.png.
You may see favicon files with the .ico extension. .ico files do a better job of rendering efficiently across most browsers, so default to this if you can.
Go to _includes/head.html, under <link rel="stylesheet" href="/Econ-Study/assets/css/style.css">, add the following line of code:
Up till now, everything is done, and if you run jekyll serve in terminal, you should be able to see the favicon appear by the name of your site.
From png to ico
Safari is strict with the favicon format, and it has more robust support for .ico files.
So if you want your favicon to work smoothly on Safari, you should convert your image to .ico format.
If you downloaded a png file, you can use magick to do the conversion.
This command will create a favicon.ico file with multiple sizes (16x16, 32x32, 48x48, 64x64, 128x128) from the original acorn.png file. The -resize option is used to specify the size of each icon in the .ico file.
Now you can use this svg file in your website as favicon see How to set favicon.
Font Awesome CDN
Font Awesome is hosted on a number of popular CDNs, enabling you to link directly to the individual SVG files. Just set the href URL of the <link> element to the desired SVG in the hosted Font Awesome library.
First you must set the update field in the front-matter. If you decide not to set the field, then the update date falls back to the date field in the front-matter.